Unlocking Flavor: Why Make Your Own Red Chili Paste?
Imagine a vibrant, fiery condiment that instantly elevates any dish, from humble noodles to gourmet stir-fries. That's the power of red chili paste. While store shelves offer numerous options, learning how to make red chili paste at home opens up a world of unparalleled freshness, customizable heat, and pure, unadulterated flavor. Unlike commercial varieties often laden with preservatives, artificial colors, and excessive sodium, your homemade paste is a testament to natural goodness and culinary control.
Crafting your own red chili paste is a deeply satisfying process that guarantees you know exactly what goes into your food. It’s fresher, often tastier, and free from unwanted additives. This versatile condiment, a staple in countless global cuisines from fiery Asian dishes to hearty Mexican stews and robust Indian curries, adds not just heat but a beautiful depth of color and complex flavor to any recipe. You might be surprised to learn that this intense flavor booster can be whipped up in your own kitchen in under an hour. Dive into the world of homemade chili paste, and you'll quickly discover why it's a game-changer for your cooking.
For more quick ideas on getting started, check out our guide on Make Homemade Red Chili Paste in 30 Minutes: Fresh & Flavorful.
Essential Ingredients for Your Perfect Red Chili Paste
The beauty of homemade red chili paste lies in its simplicity and the quality of its core components. While the basic framework remains consistent, subtle ingredient choices can dramatically alter the final flavor profile and heat intensity.
Choosing Your Chilies: Heat and Hue
The foundation of any great red chili paste begins with the chilies themselves. Dried red chilies are preferred for their concentrated flavor and deep color. Your selection here dictates both the heat level and the visual appeal of your paste:
- Kashmiri Chilies: Ideal if you prioritize a vibrant, rich red color with minimal heat. They offer a mild fruitiness, perfect for adding visual pop without overwhelming the palate.
- Szechuan Chilies: Known for their unique smoky aroma and a pleasant, medium heat. They bring a distinctive character that's fantastic for specific regional flavors.
- Arbol Chilies: Slender and potent, these provide a sharp, clean heat. A great choice for those who like it spicy without much complexity in flavor.
- Guajillo Chilies: Larger with a mild to medium heat and a sweet, slightly smoky, and fruity flavor. They contribute a beautiful deep red hue.
- Thai Bird's Eye Chilies: Small but mighty, these are for the serious heat seekers. Use sparingly, or combine with milder chilies for balanced spice.
Feel free to mix and match varieties to achieve your desired balance of heat, color, and flavor complexity. Always remove the stems before soaking.
Aromatic Boosters & Flavor Balancers
Beyond the chilies, a few key ingredients transform simple heat into a symphony of flavors:
- Cooking Oil: A neutral oil like vegetable, canola, or grapeseed is best, allowing the chili flavor to shine. It helps carry the flavors and creates a smoother paste.
- Fresh Garlic & Ginger: These aromatic powerhouses are non-negotiable for a truly fragrant paste. Minced fresh ginger and garlic provide a pungent, warming depth.
- Salt: Essential for seasoning and bringing out the chilies' natural flavors.
- Sugar: Balances the heat and acidity, adding a touch of sweetness that rounds out the paste.
- Vinegar: White or rice vinegar adds a crucial tangy note, brightening the paste and acting as a natural preservative.
- Optional Enhancers:
- Soy Sauce: A dash can add umami depth, particularly for Asian-inspired pastes.
- Lemon Juice: Offers a brighter, fresher tang than vinegar, lending a different aromatic dimension.
Step-by-Step Guide: How to Make Red Chili Paste at Home
Mastering how to make red chili paste involves a straightforward three-stage process: rehydration, blending, and cooking. Each step is crucial for achieving the perfect texture and flavor.
Preparation: Rehydrating Your Chilies
The first step softens the dried chilies, making them easier to blend into a smooth paste and enhancing their flavor. Begin by removing the tough stems from your chosen dried red chilies. Place the stemmed chilies in a heatproof bowl. Pour boiling water over them, ensuring they are fully submerged. To keep them under water, you can place a heavy, heat-safe object (like a smaller plate) on top. Let them soak for 25-30 minutes, or until they are visibly plump and pliable. This rehydration is key to achieving a smooth consistency.
The Blending Brilliance: Achieving the Right Texture
Once the chilies are soft, it's time to transform them into a paste. Carefully drain the chilies, but be sure to reserve about ½ to 1 cup of the soaking water. This reserved water is liquid gold – it's packed with chili flavor and helps achieve the desired consistency during blending. Transfer the rehydrated chilies to a high-speed blender or food processor. Add a few tablespoons of the reserved soaking water to start. Blend until you achieve a smooth, vibrant paste, stopping occasionally to scrape down the sides. Add more soaking water a tablespoon at a time if needed to help the blades catch and ensure an even blend. Some home cooks prefer a paste with a bit of texture, while others aim for ultra-smoothness. If you don't have a very powerful blender, you might consider removing some chili seeds before blending to reduce potential bitterness, though including them is perfectly acceptable and adds to the heat.
Cooking to Perfection: Developing Deep Flavors
The final stage brings all the flavors together and helps preserve the paste. Heat 2-4 tablespoons of your chosen cooking oil in a pan over medium heat. The amount of oil can be adjusted based on how rich you want your paste to be.
- For Plain Chili Paste: If you're aiming for a pure chili flavor without additional aromatics, simply add the blended chili mixture directly to the hot oil. Sauté for 3-4 minutes, stirring constantly, until the paste deepens in color and smells wonderfully fragrant.
- For Seasoned Chili Paste (Recommended): For a more complex and balanced flavor, first add your minced garlic and ginger to the hot oil. Sauté for just 30-40 seconds until fragrant, being careful not to burn them. Immediately add the blended chili paste to the pan. Stir well to combine with the aromatics. Now, add your salt, sugar, and vinegar. Stir everything thoroughly and continue to cook for another 2-5 minutes. This cooking process is vital: it mellows the raw chili flavor, deepens the color, infuses the paste with the aromatics, and allows the sugar and vinegar to perfectly balance the heat. Do not overheat the paste, as it can burn easily and develop a bitter taste.
Mastering Storage: Keeping Your Homemade Chili Paste Fresh
Once you’ve gone through the effort of learning how to make red chili paste, proper storage is crucial to preserve its vibrant flavor and extend its shelf life. Cooling the paste completely before storing is paramount to prevent condensation and bacterial growth.
Short-Term Solutions: Refrigeration
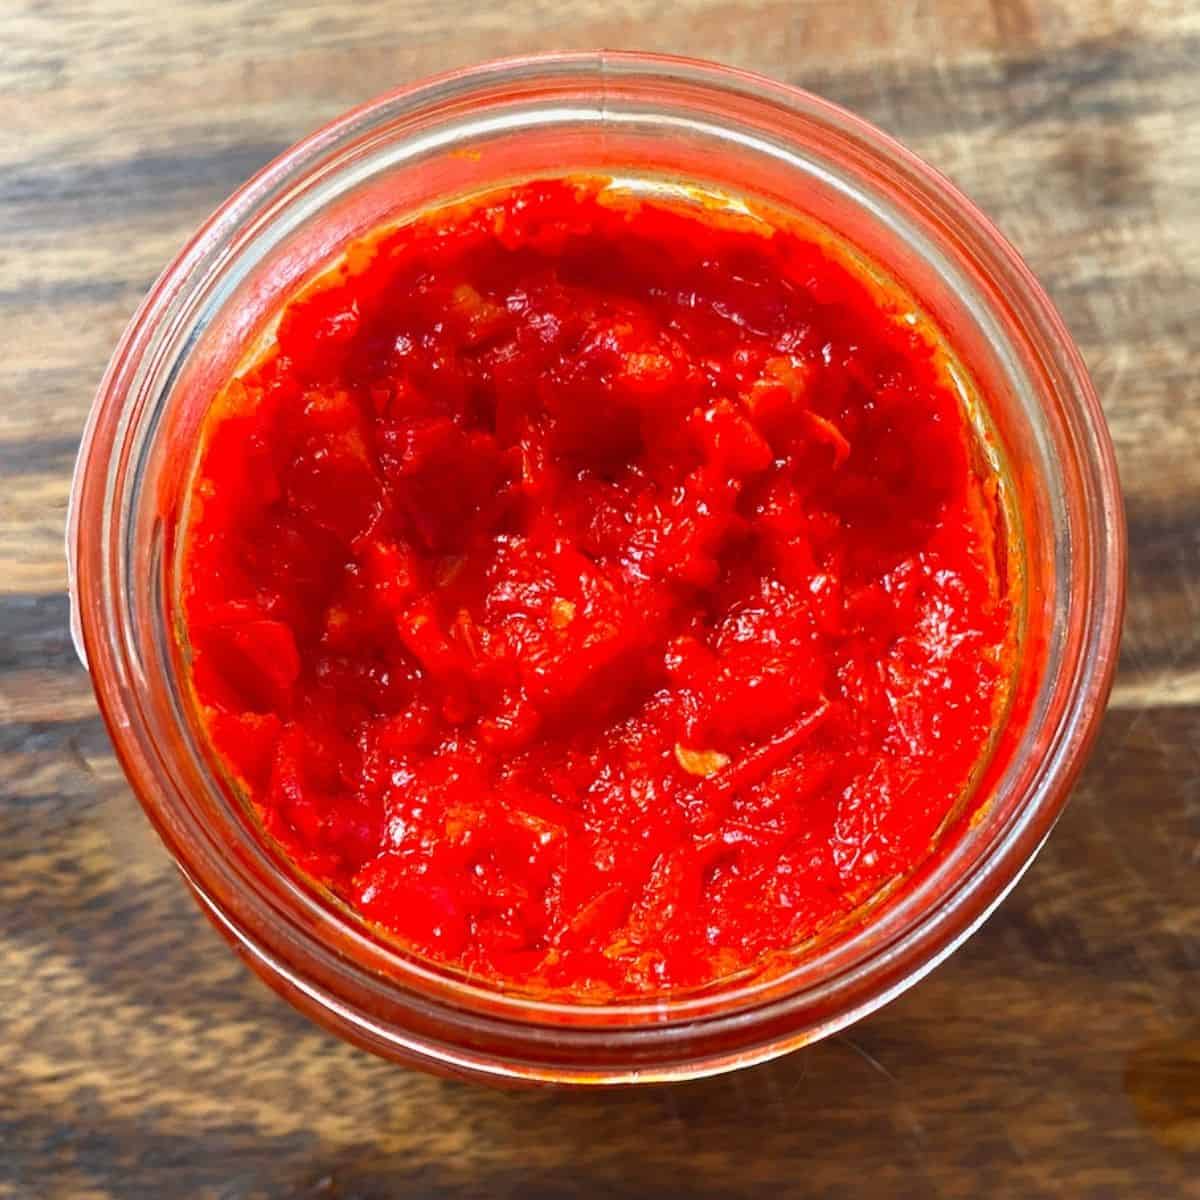
For everyday use, transfer the cooled chili paste into a clean, airtight container or jar. A thin layer of neutral oil poured over the top of the paste in the jar can act as an additional barrier against air and mold. Stored this way, your homemade red chili paste will keep beautifully in the refrigerator for up to 15 days. Always use a clean spoon when scooping out the paste to avoid contamination.
Long-Term Saviors: Freezing & Water Bath Canning
If you've made a larger batch or wish to enjoy your paste for months, freezing and canning are excellent options:
- Freezing: For convenient portions, spoon the cooled paste into ice cube trays and freeze until solid. Once frozen, transfer the chili paste cubes into a freezer-safe bag or container. This method allows you to thaw just what you need, minimizing waste. Frozen chili paste can maintain its quality for up to 6 months.
- Water Bath Canning: For truly shelf-stable, long-term storage, water bath canning is a fantastic method, allowing your chili paste to last up to a year or more. This process involves heating filled jars in boiling water to create a vacuum seal.
- Prepare Jars: Ensure your canning jars, lids, and bands are sterilized and warm.
- Fill Jars: Ladle the hot chili paste into the warm jars, leaving about ½ inch of headspace. Remove any air bubbles with a non-metallic spatula.
- Wipe Rims: Clean jar rims thoroughly to ensure a good seal. Place lids and bands, tightening to fingertip-tight.
- Process: Place jars in a boiling water canner, ensuring they are covered by at least 1 inch of water. Bring to a rolling boil and process for the time specified by a reliable canning guide for your altitude (typically 15-20 minutes for half-pint or pint jars).
- Cool: Carefully remove jars and let them cool undisturbed on a towel-lined surface for 12-24 hours. Check for seals – lids should be concave and not flex when pressed.
Canning requires careful attention to safety guidelines, so always consult reputable canning resources for precise processing times and techniques specific to your location and ingredients. For more detailed instructions on custom flavors and canning techniques, explore our article on Craft Your Perfect Red Chili Paste: Custom Flavors & Canning Tips.
Pro Tips for an Unforgettable Red Chili Paste
- Taste and Adjust: Always taste your paste during the cooking stage. Adjust salt, sugar, and vinegar incrementally until the flavor profile perfectly suits your preference.
- Handle with Care: When working with dried chilies, especially potent ones, consider wearing gloves to prevent skin irritation. Avoid touching your eyes or face.
- Texture Control: For a coarser paste, simply blend for a shorter duration. For a super smooth paste, a powerful blender and slightly more soaking water will be your best friends.
- Beyond Basic Seasoning: Experiment! A pinch of roasted cumin, coriander, or star anise can add unique aromatic layers. A splash of fish sauce can introduce another dimension of umami.
- Creative Uses: Don't limit your paste to just stir-fries. Mix it into marinades for meats or tofu, whisk into salad dressings, spread on sandwiches, dollop onto scrambled eggs, or stir into soups and stews for an instant flavor boost.
Mastering how to make red chili paste at home is a rewarding culinary adventure. It’s a straightforward process that grants you complete control over flavor, heat, and ingredients, resulting in a condiment far superior to any store-bought alternative. From selecting your perfect chilies to balancing the aromatics and mastering preservation techniques, each step contributes to a fresh, vibrant, and incredibly versatile paste that will undoubtedly become a staple in your kitchen. So, gather your ingredients, unleash your inner chef, and prepare to elevate your meals with the unparalleled taste of homemade red chili paste!
